You can create a Workshop Event by navigating to the “Workshop Events” menu option, then selecting “Create Workshop Event.” If you’re unfamiliar with the workshop creation process, please see the video walkthrough, "How-To Guide," and Workshop Design Guidance below:
NOTE: ONLY EMPLOYEES and DISTI can create events. EMPLOYEES, DISTI, and PARTNERS can, however, proctor events.
The following 7-minute video provides a comprehensive walkthrough for creating a workshop event. If you prefer more detail, please use the step-by-step guide below: “How-to Guide: Workshop Event Creation/Request.” If you have additional questions, please review the other FAQs before reaching out to the team.
Video Walkthrough(Update Coming Soon) :
If you were able to successfully create a workshop using the video walkthrough, please proceed to the steps below. If you were not able to create a workshop event using the video, please refer to the “How-to Guide: Workshop Event Creation/Request” provided below:
Once you’ve wrapped up creating the workshop event, here’s what comes next in the process:
- Sending Invites for Your Workshop Event
- Check In Participants At The Start of Your Event
How-to Guide: Workshop Event Creation/Request
This is a How-To guide for event creation for the new Cisco Security Workshop platform. This process on average takes 10-15 minutes but once completed your workshop will be fully setup and available to you immediately.
How is this different from the previous process?
- This new platform is 100% automated so when you request an event (after clicking Save and Close) you will be notified of the event creation and can immediately start inviting your customers.
- Your customers will register in the same portal in which you requested the event, and you will be able to give them a unique URL for the invite.
- The best part of this new platform change is there is no longer the need for Enrollment Keys for your customer.
- In addition, you can see who has registered to your event within the platform.
- You can check them into the platform when they arrive to your event.
Who Can Proctor Workshop Events - Currently only Cisco employees can schedule a workshop event.
Prerequisites for Creating a Workshop Event:
- Which type of workshop are you going to run?
- Where will the event be located?
- What is the date and time of the event?
- How long do you want to leave the event registration open?
- How many seats are available for your event?
- Do you want a wait list and how many people do you want to allow on the wait list?
- Description of your event (Copy and Paste from - Short Description Templates).
- How many total hours will your event run?
- What is your GEO?
- What is the purpose of your event (sales, marketing, POV, etc.)?
- Who will be proctoring your event? This needs to be a certified proctor for the specific workshop you are scheduling.
Workshop Event Creation/Request Process [10-15 Minutes to Complete]
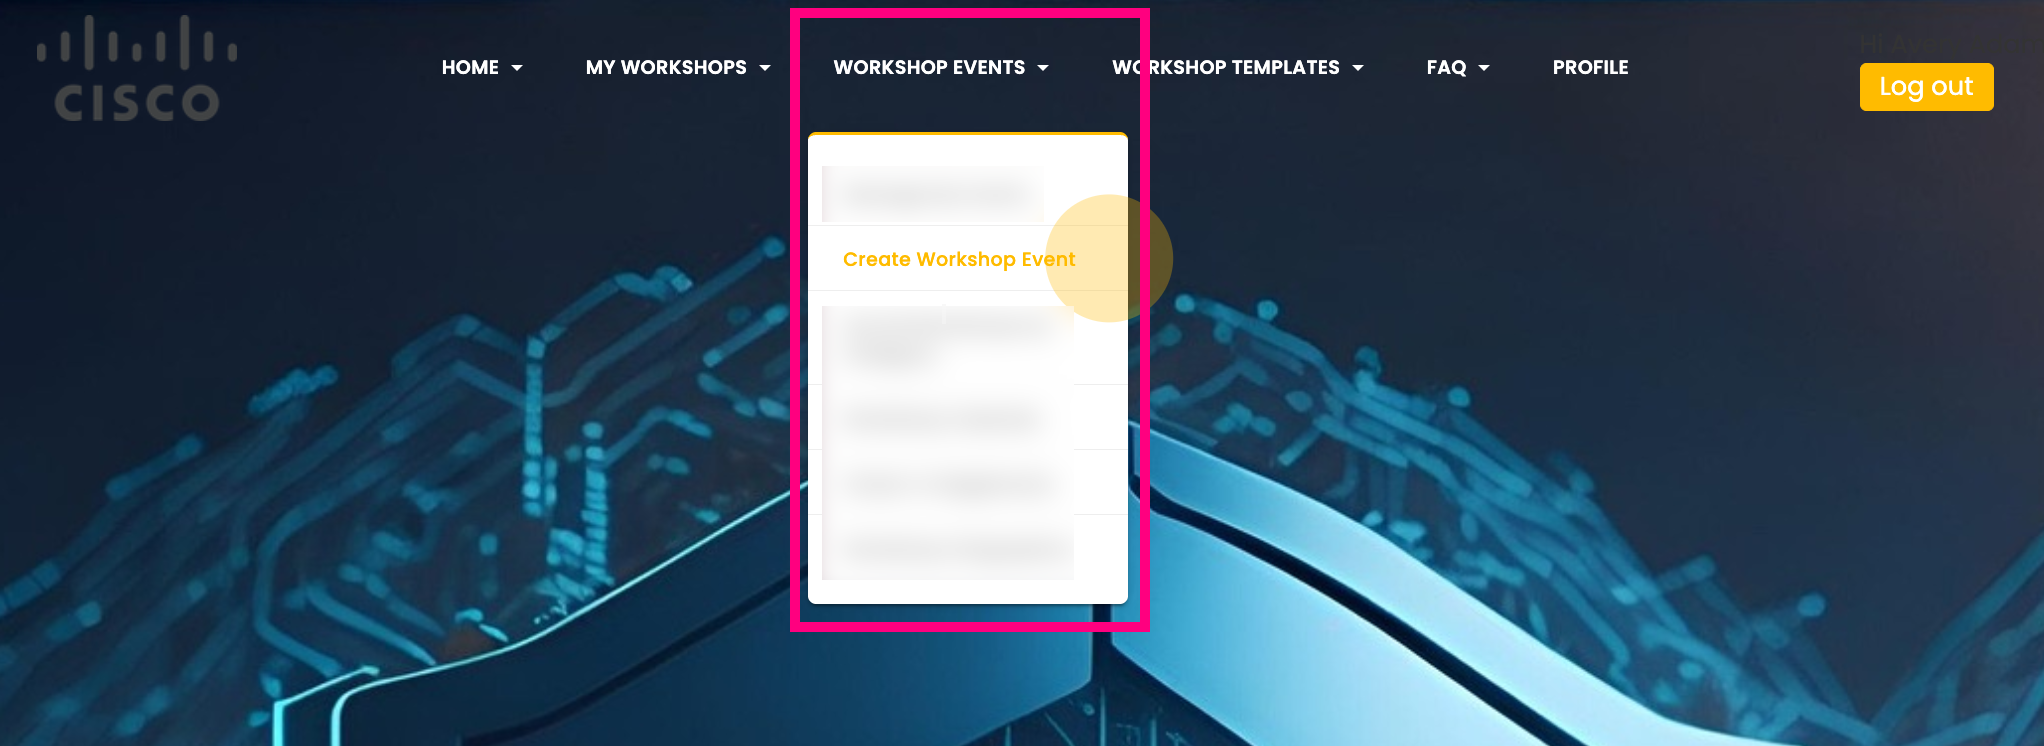
1. Click on "Workshop Events"
2. Click on "Create Workshop Event"
a. Note: This will take a few seconds to load

3. Click on “Basic Information” tab
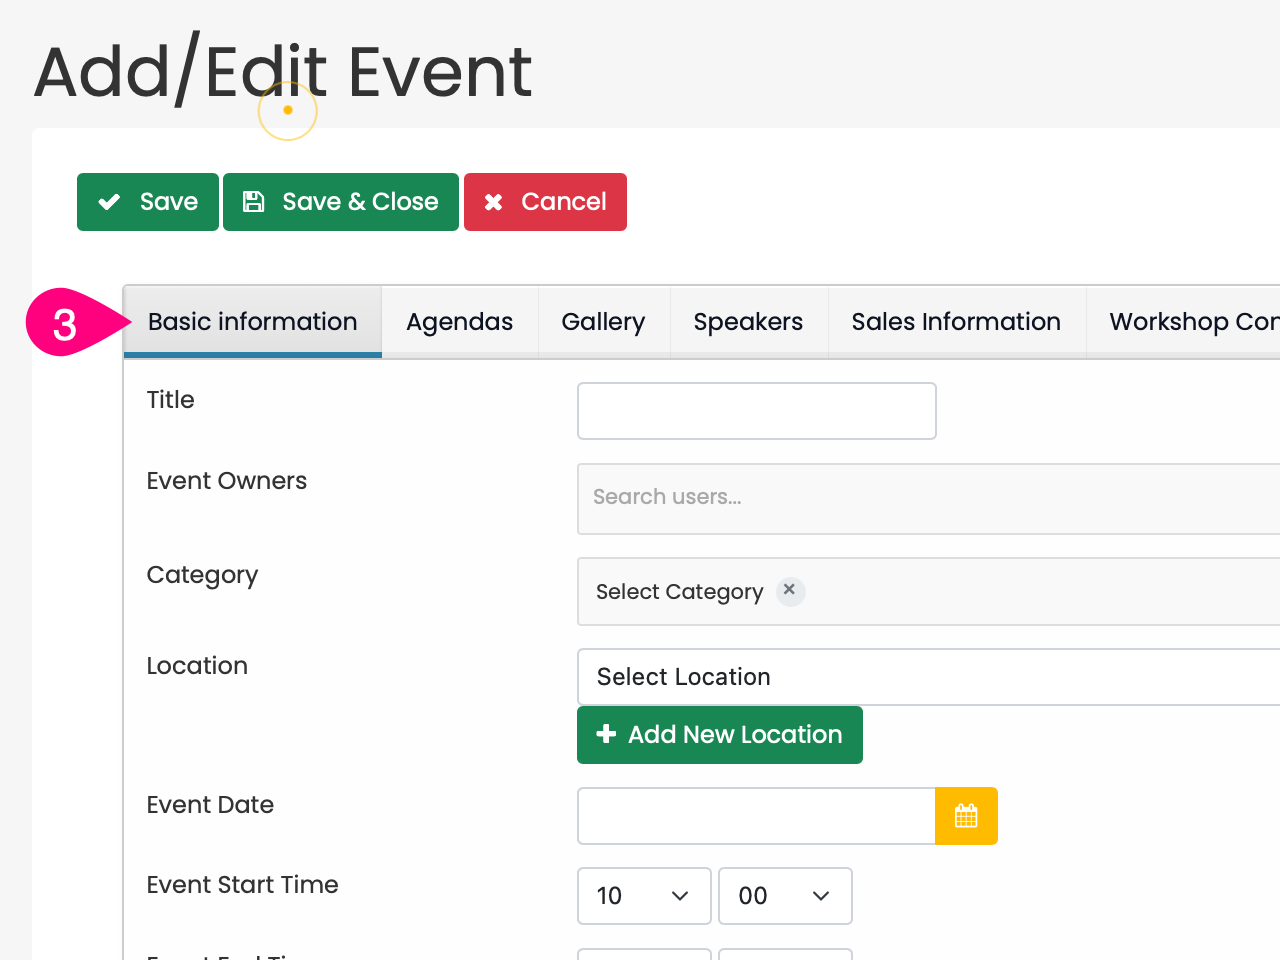
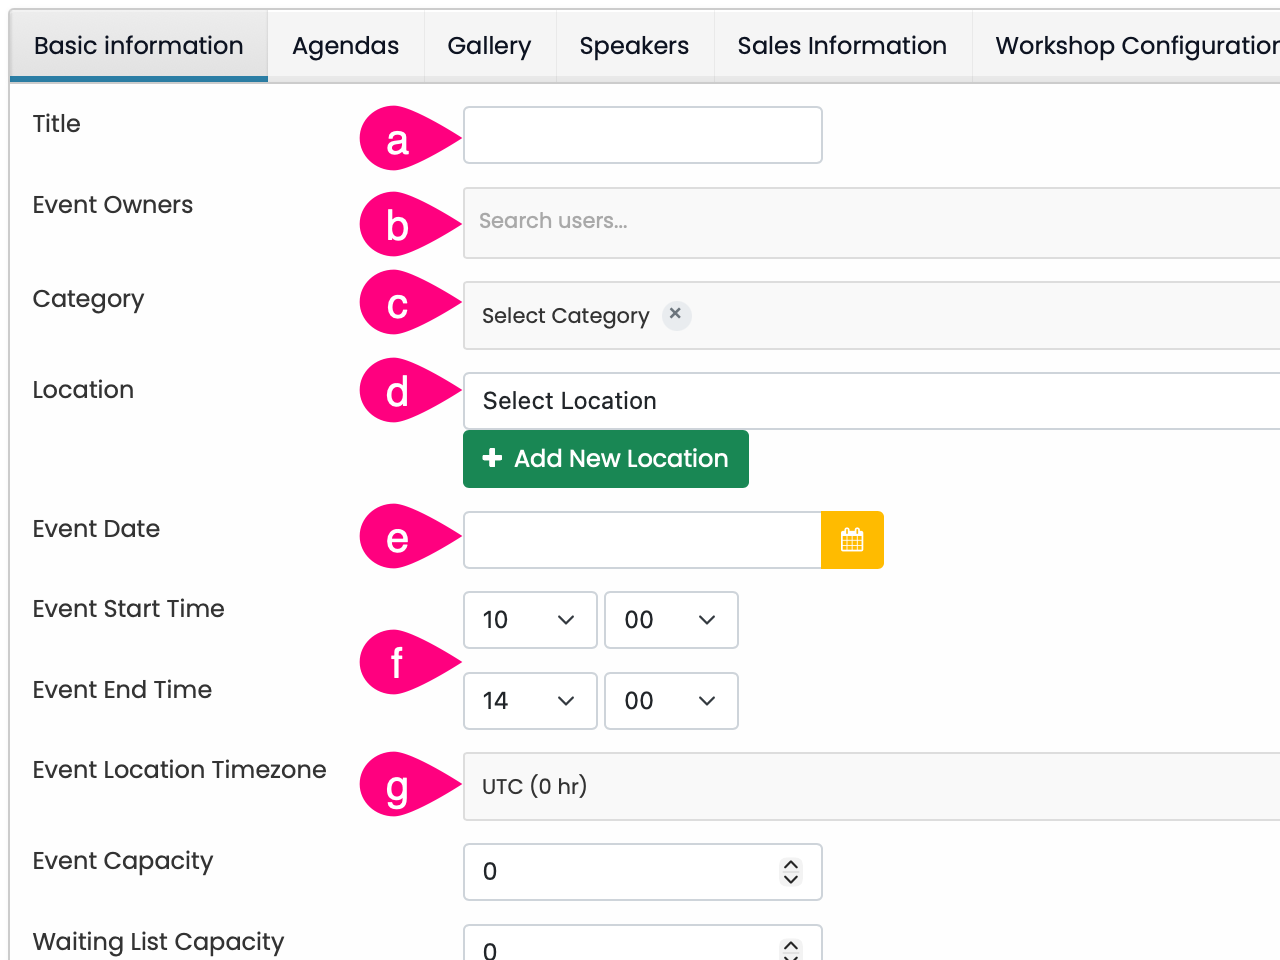
a. Enter in the “Title”
i. Note: It is recommended that you use the name of the workshop and the location so that the event is unique, this will create a unique URL that can be sent out after the workshop is created.
b. Select the “Event Owners”
i. Note: Owners and Proctors can check people into the event, Owners do not have to be certified as a proctor, an event can have multiple owners. A certified Proctor is required to be listed.
c. Select the “Category”
i. Note: if you are running a workshop as a POV, please select POV and not the regular category
d. Select the “Location”
e. Select a “Event Date”
f. Choose a “Event Start Time” & “Event End Time”
i. Note: This setting does not give a student more or less time with the lab. Most courses allow the students to continue to login for the remainder of the week. The time and date are based on the attendee's current browser location so adjust accordingly. The End Time is used as the ending time of the calendar event that is created associated with this event.
g. Choose a “Event Location Timezone”
i. Note: Make sure that you choose the time zone where your event will be hosted
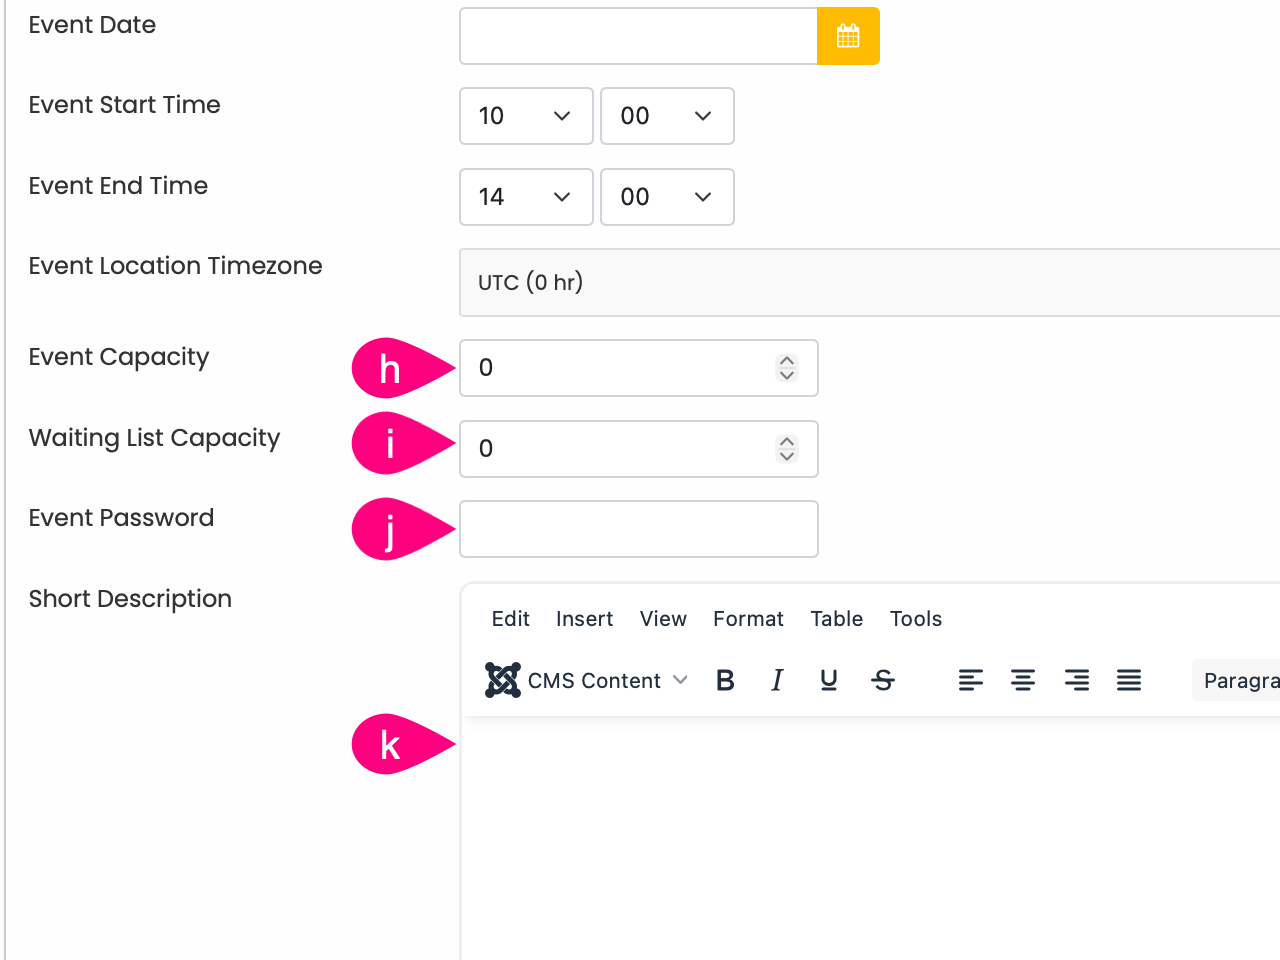
h. Enter the desired “Event Capacity”
i. Enter the desired “Waiting List Capacity”
i. Critical: Set your 'Waiting List Capacity' higher than Event Capacity for overflow management.
j. Enter the “Event Password”
i. Note: Choose a password if you want this to be a private event
k. Enter in a “Short Description”
i. Note: You can get that from the description of workshop you are hosting. Course descriptions and pictures can be found here, or you can copy and paste from the short description templates menu. You can add text and images. You can make your description different from what the course currently has; it is up to you. In the future, we will automate the field, and you will no longer have to fill it out.

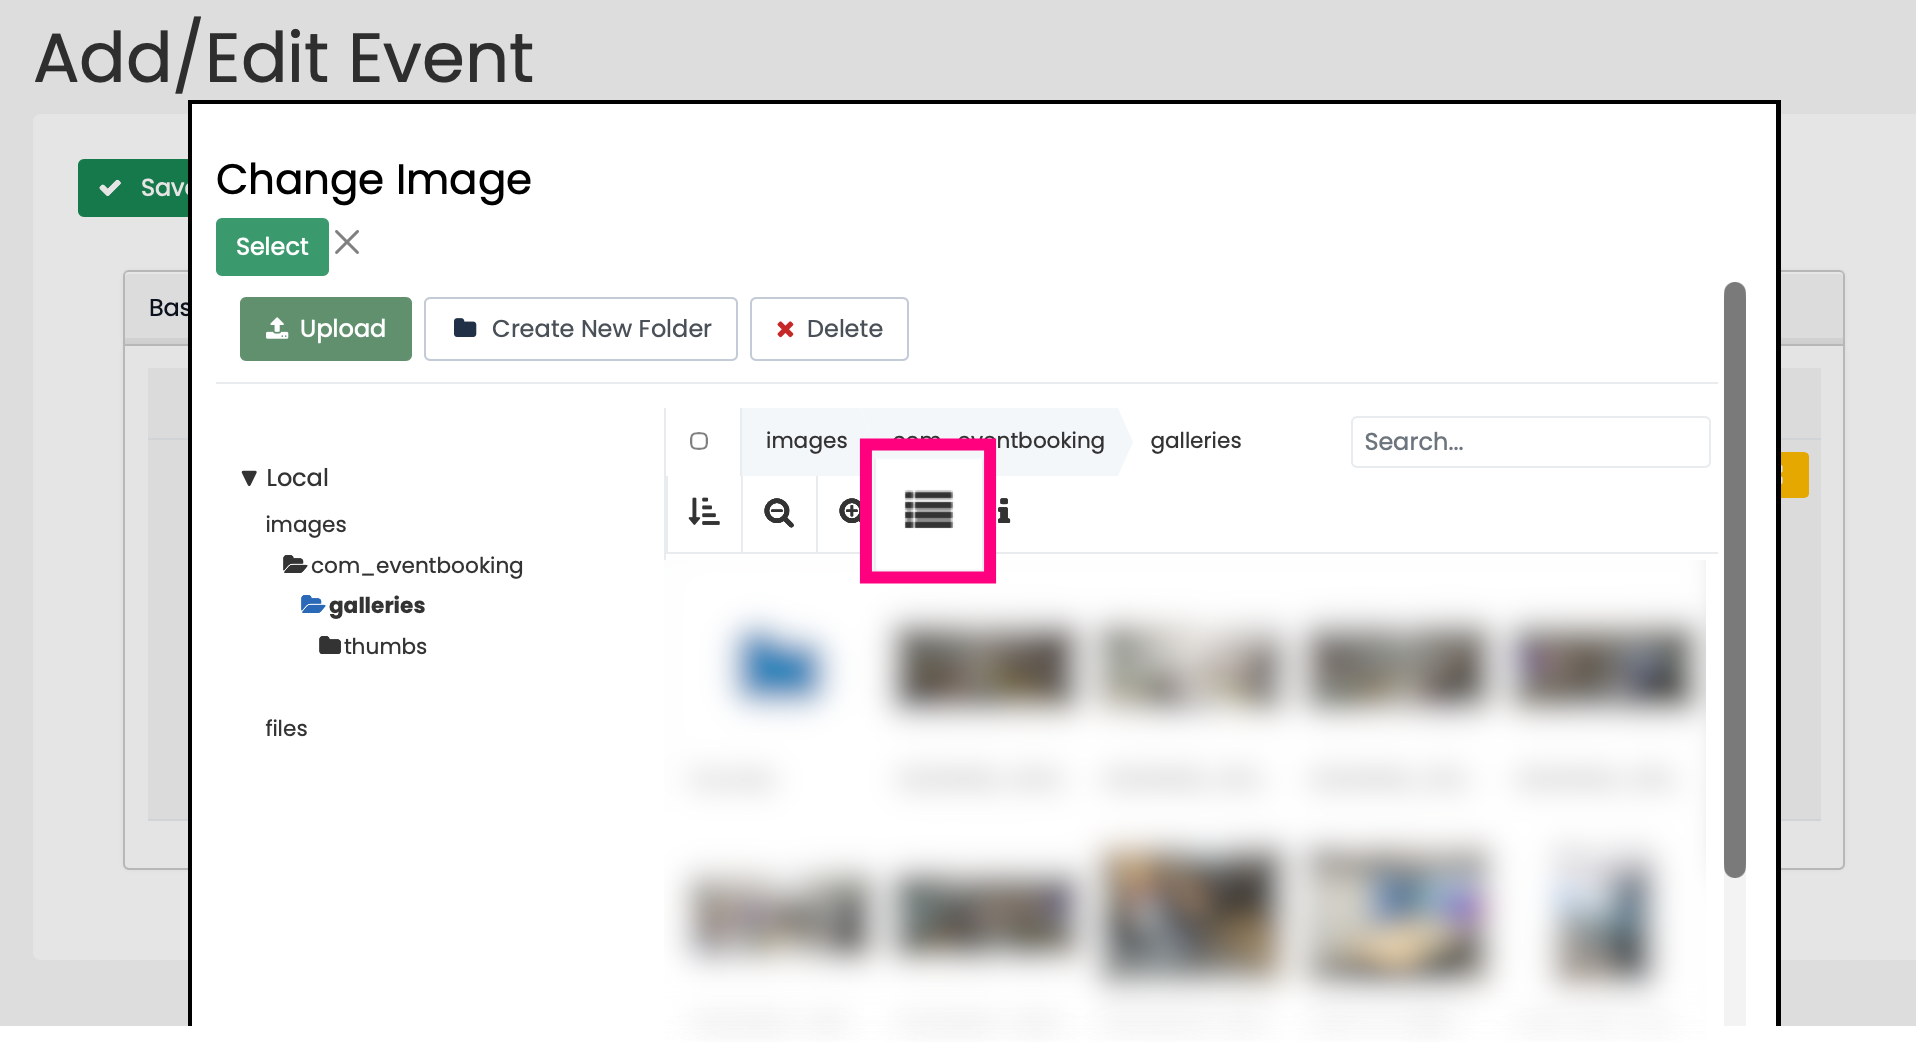
l. Select “CMS Content”
m. Select “Media”

n. Select “com_eventbooking”
o. Select a desired Image for your event
i. Note: The "Additional Data" pop-up indicates that you have made a selection
p. Select the “Insert Media” button
Note: Thumbnail View is the best for using the Media Gallery, try out List and Thumbnail view.
4. Select the “Sales Information” Tab
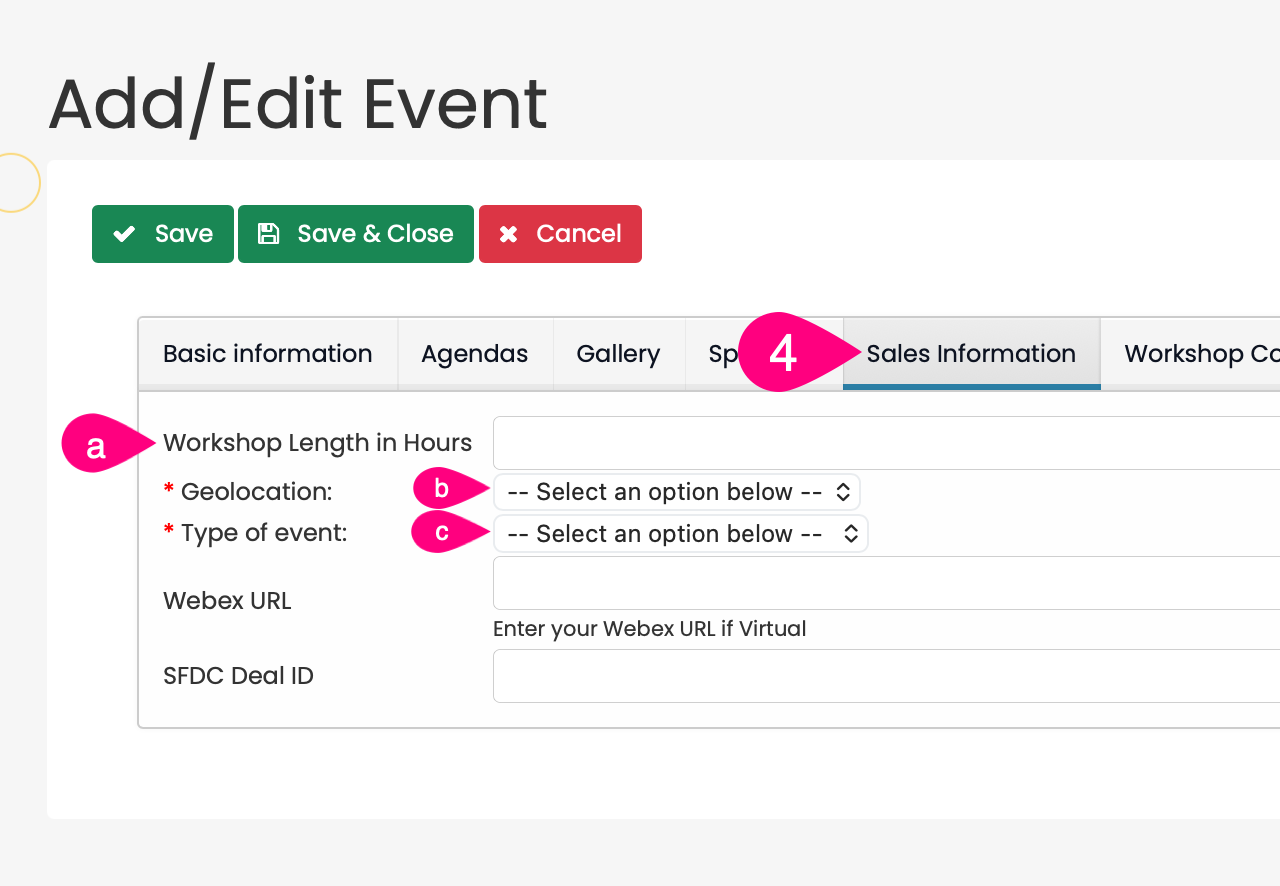
a. Enter in your projected “Workshop Length in Hours”
b. Select the “Geolocation”
c. Select the “Type of Event”
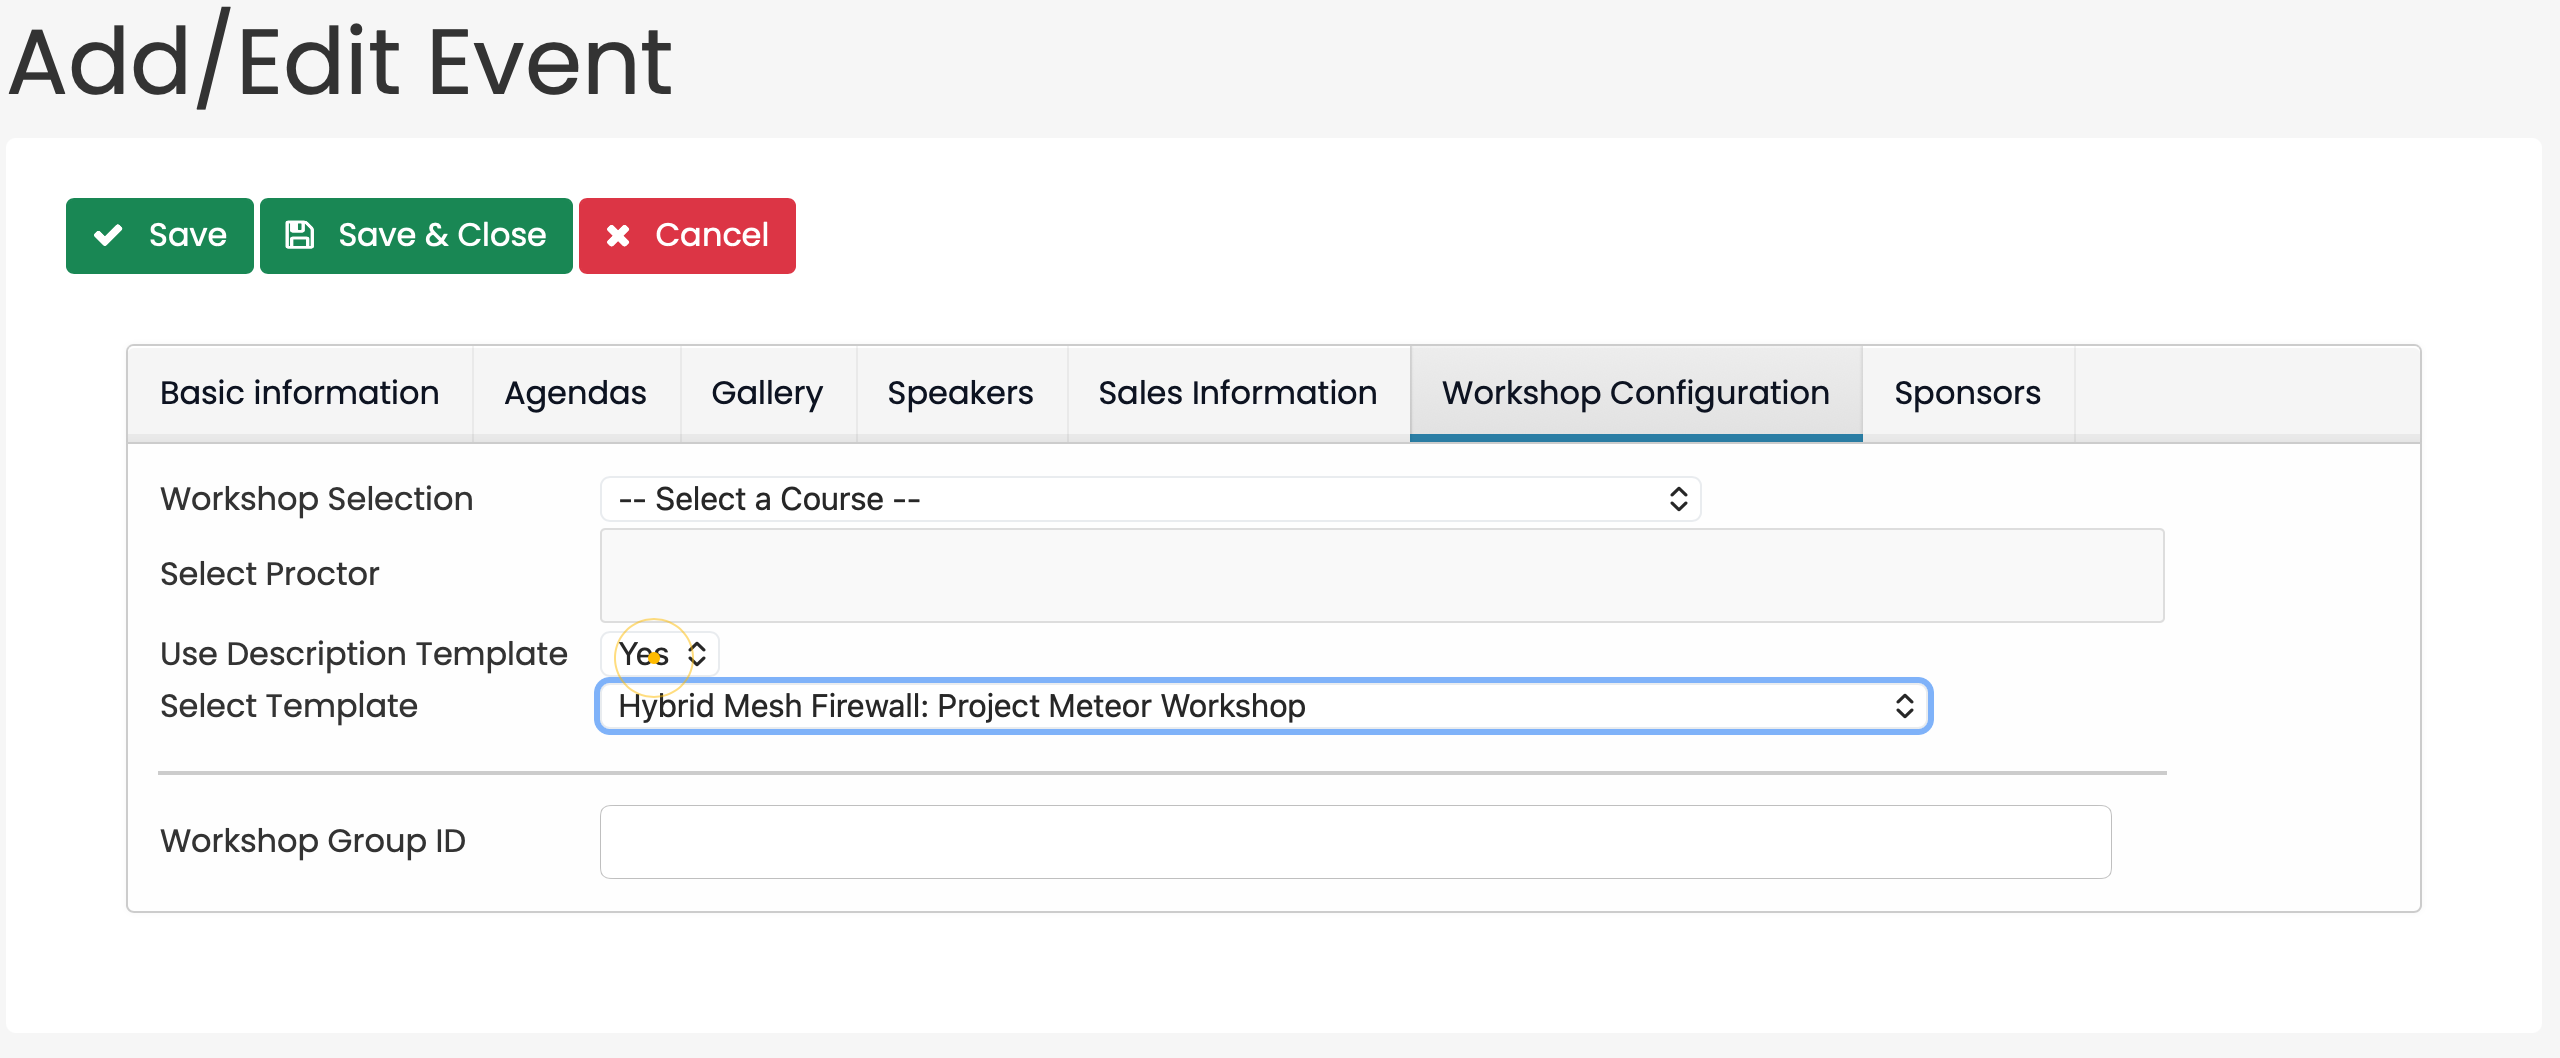
5. Select the “Workshop Configuration” tab
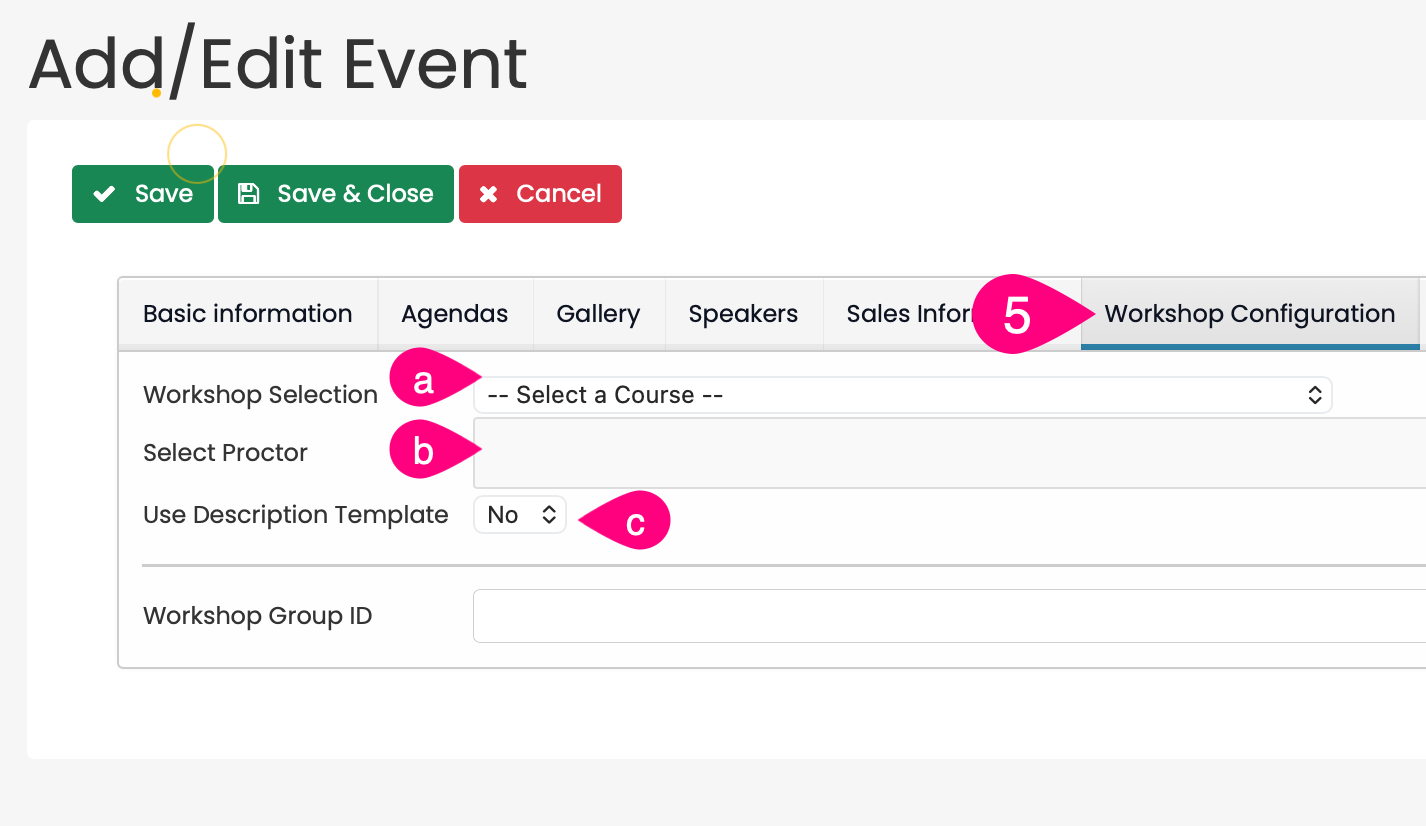
a. Select a “Workshop Selection”
i. Note: This will be the workshop you want to use for your event
b. Add users to the “Select Proctor”
i. Note: This will be the proctor for your workshop event, if you’re not the proctor verify with the person you have chosen before submitting the workshop even creation/request.
ii. Note: You can select multiple proctors by using ctrl-select (WIN) and cmd-select(MAC).
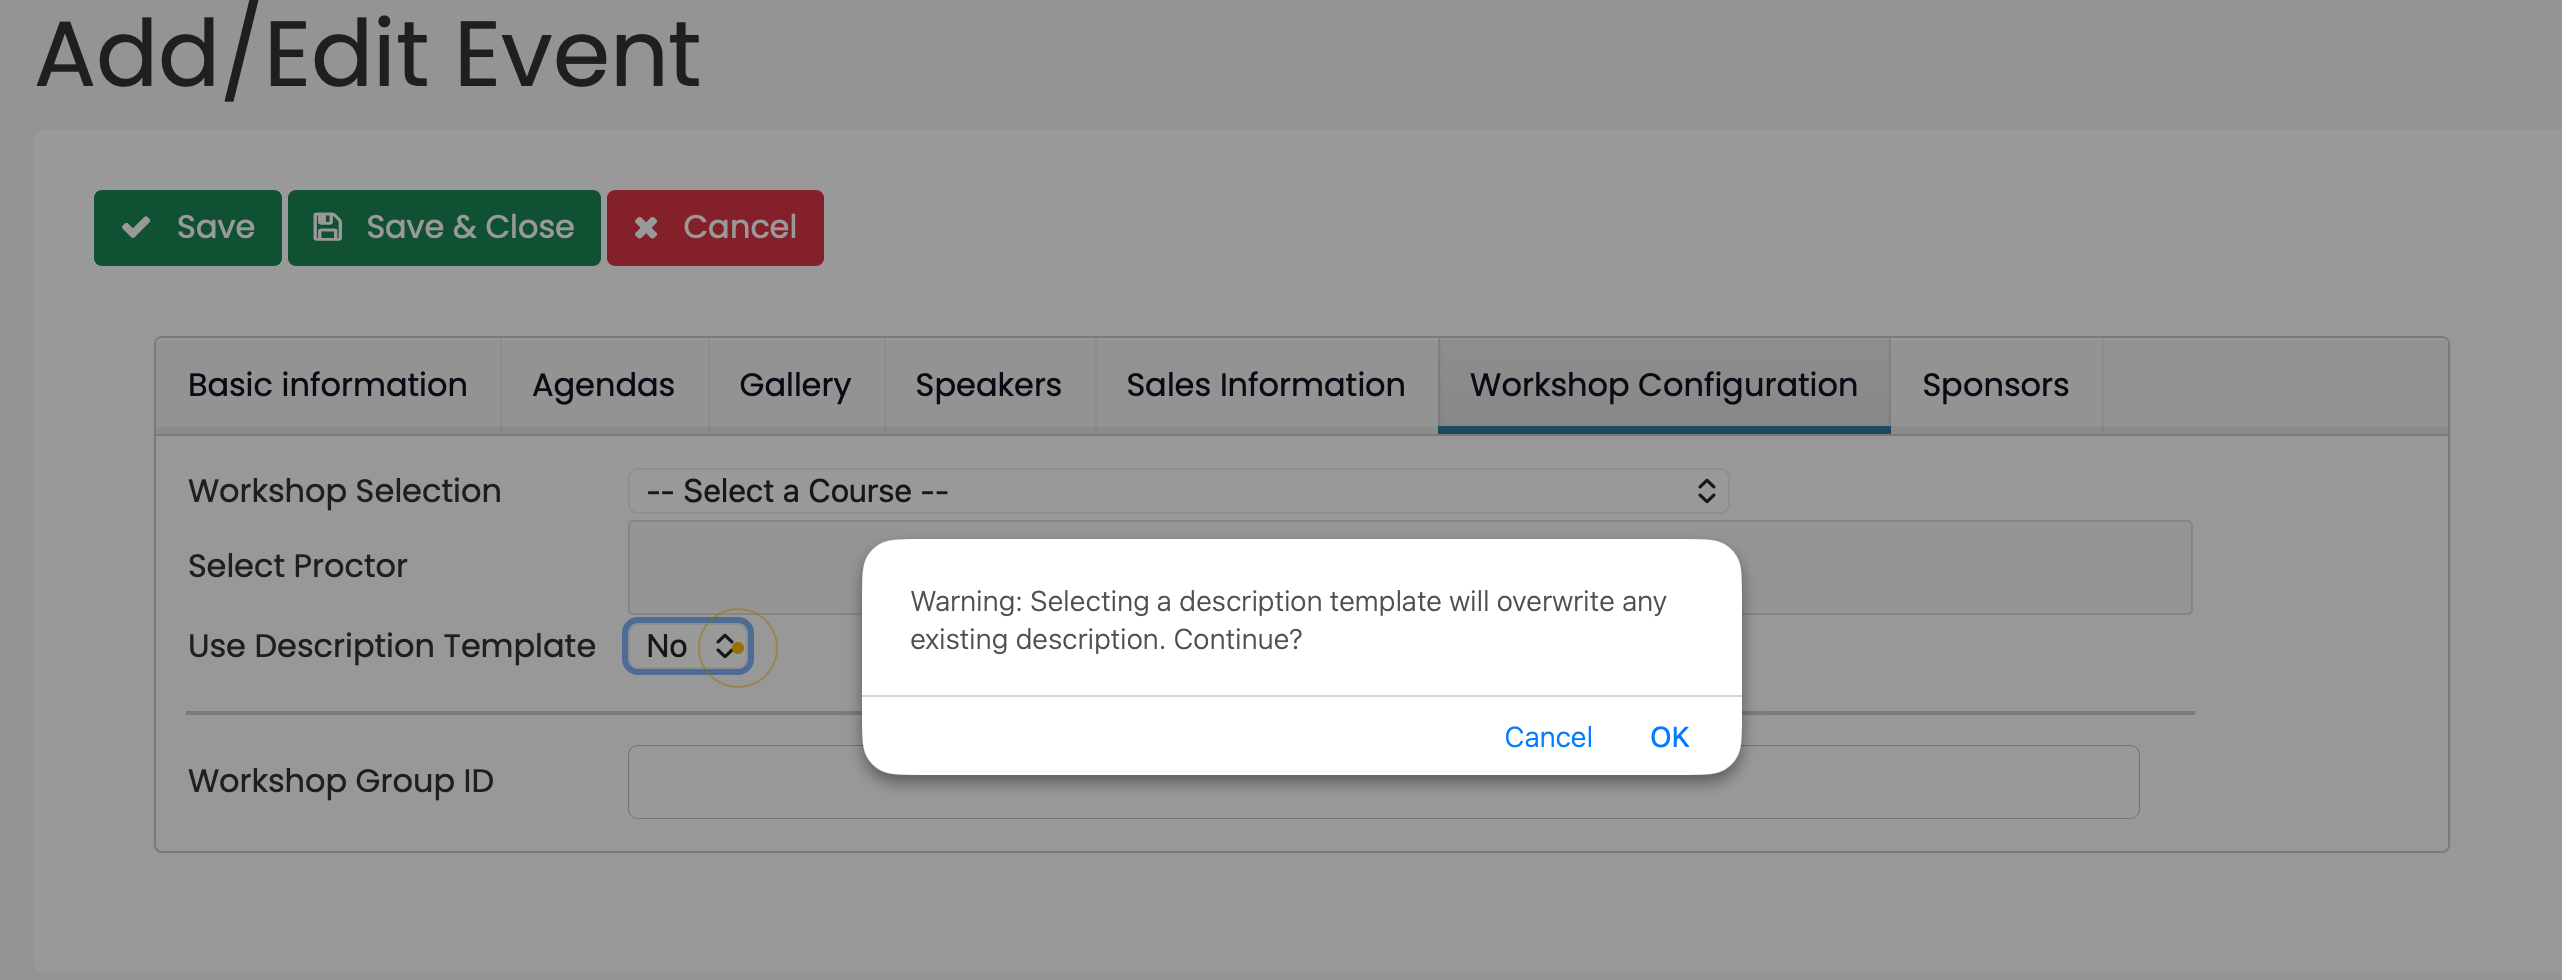
EVERY WORKSHOP EVENT IS REQUIRED TO HAVE A DESCRIPTION – COMPLETE THE BELOW STEP TO ADD A DESCRIPTION AND NAVIGATE TO SHORT DESCRIPTION TEMPLATES PAGE TO SEE THE TEMPLATES BEFORE MAKING A SELECTION
c. Select “Yes” within the “Event Owners Use Description Template” dropdown
i. Select “OK” to confirm that you are overwriting your previous description
ii. Select your desired template
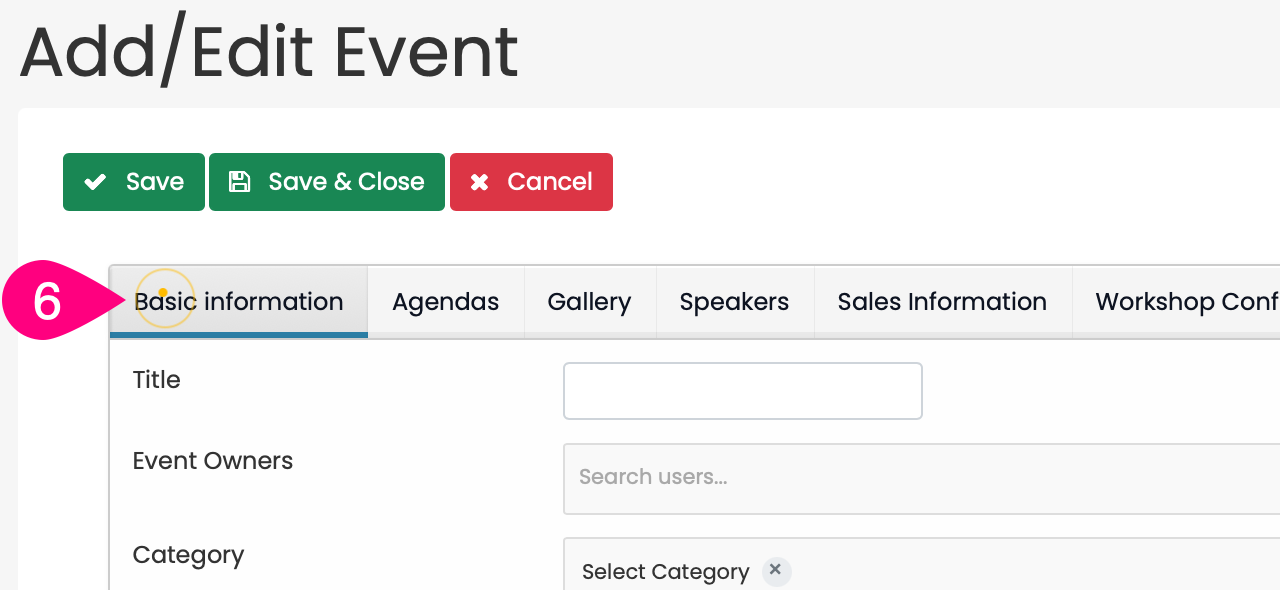
6. Select the “Basic information” tab
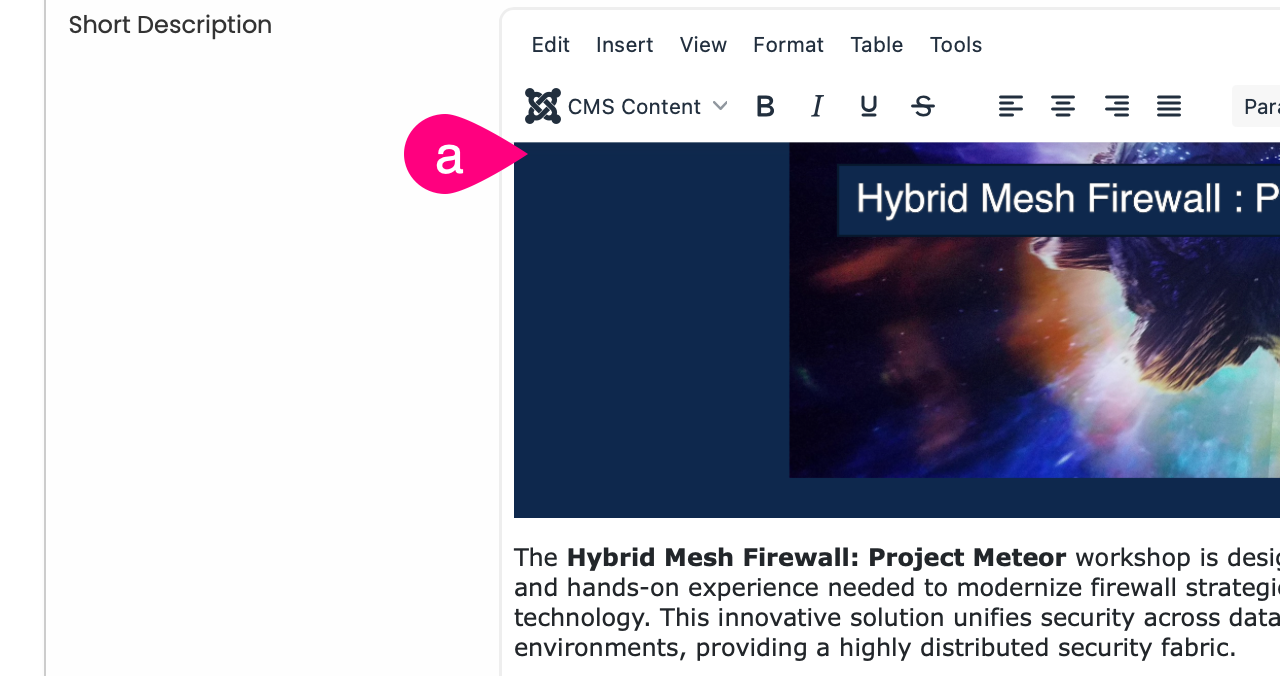
a. Scroll Down to the “Short Description” section
i. Note: The template selected in the previous step will populate here
7. Select the “Sponsors” tab
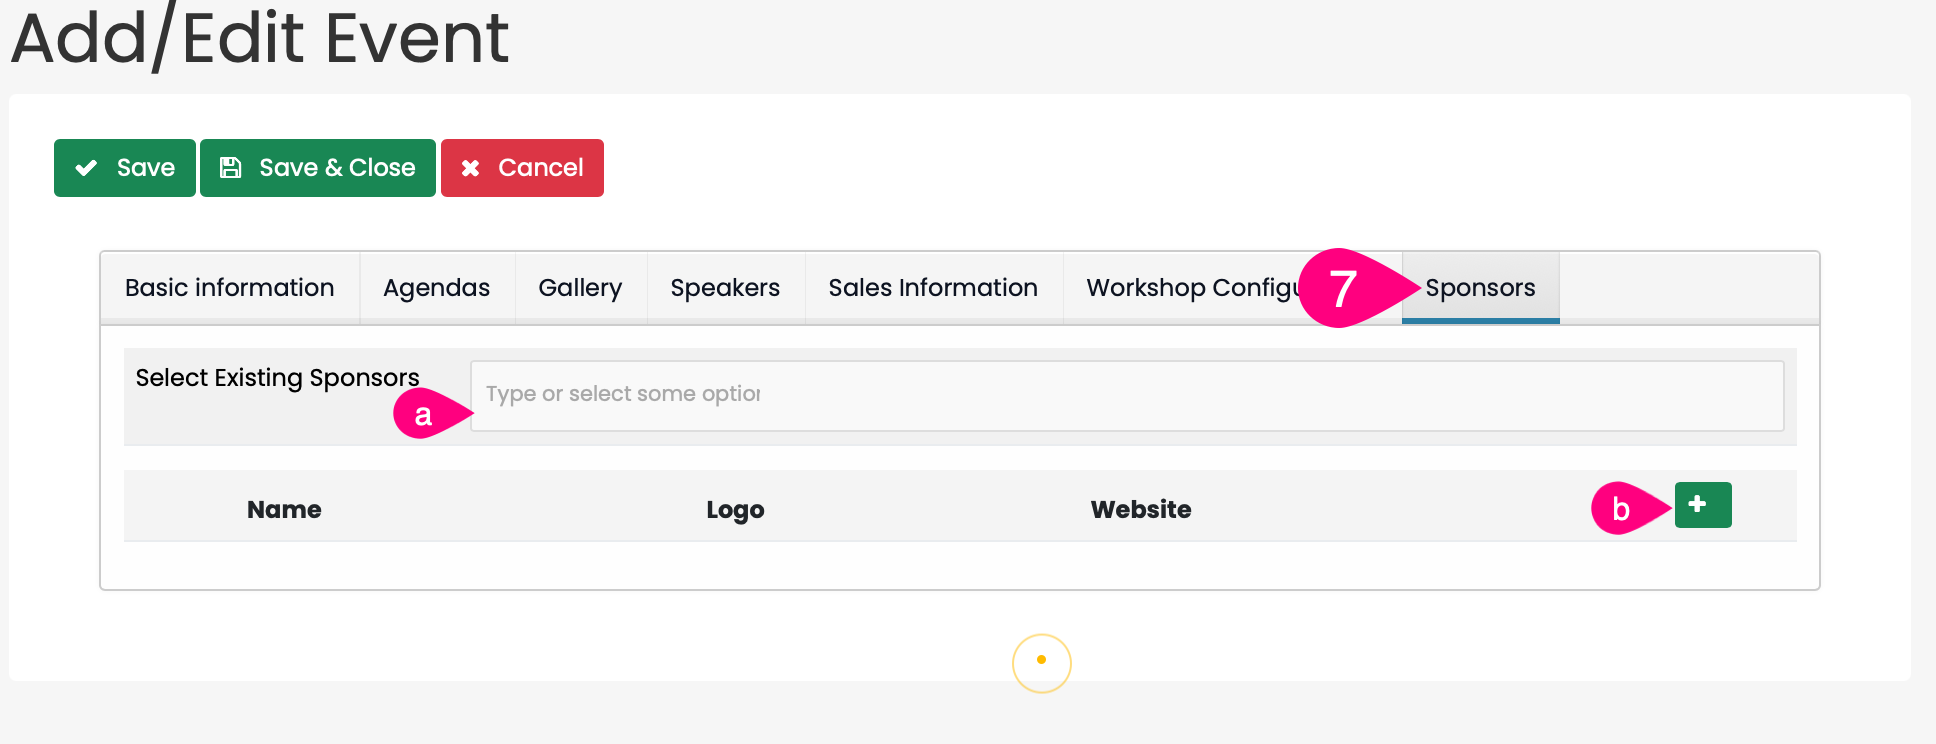
a. Select the “Select Existing Sponsors” box
i. Note: This allows you to select the company or companies sponsoring the event, you should always select Cisco, but in the event that you have a partner also driving customers to an event then you can use their logo in addition Cisco.
b. If the partnering company's information is not an option, you can add the partner by click the green plus in the bottom right next to "Website".
8. Click the “Save & Close”

9. Your event has been successfully created.

The Next Two Steps in this Process:
- Sending Invites to Your Workshop Event
- Check In Participants At The Start of Your Event
UPDATE: You must now make sure you CHECK IN people to your event AFTER they have registered in order for them to enter the course.
Workshop Design Guidance:
Please see Workshop Template which is an example event that serves as the benchmark design for all subsequent future events. For short description navigate to the Short Description Templates for a list of descriptions that you can choose from.
Speaker images
Speaker images are most effectively presented when they are square, centrally aligned, and of high resolution. A square headshot produces the most refined presentation within the speaker section. Please ensure that a description is included. Keep the face centered. Avoid landscape banners or portrait crops with the subject near the edge. Non-square images are accepted, but they produce an inconsistent result.
Recommended: 800 × 800 px or larger
Sponsor logos
Sponsor logos should be displayed in a manner that is clean, centered, and cropped with minimal unnecessary whitespace. Horizontal logos typically produce the most consistent appearance. It is advisable to prefer horizontal or well-balanced square logos. Very tall logos should be avoided to ensure uniform presentation. Excess whitespace should be removed. Padding and proportions across different sponsors should be standardized to maintain consistency within the row. When available, transparent PNG files are preferred.
Recommended: 800 to 1400 px wide
Best practice: use transparent PNG files when possible
Gallery images
Gallery images are displayed as square thumbnails and must remain understandable when viewed at a smaller scale. Choose images with clear focal points and, where possible, reduce the use of visuals with extensive text. Ensure images are composed to crop neatly into a square format, with the primary subject positioned centrally. Refrain from dense screenshots, small text, or layouts placing information at the edges, as these are not easily legible at thumbnail size.
Recommended: 1000 × 1000 px or larger
Minimum: 600 × 600 px
Other Related FAQs:
- Who Can Proctor Workshop Events?
- How Do I Check-In Attendees to My Workshop Event?
- How to Sign Up for Workshops Yourself [Enrollment Keys]
- How Do I See My Survey Results?
- Will the Template Replace My Description?
- How Do I Invite Customers to My Workshop Event?
- What Time Zone Is Used When Creating Events?
- Why Do I Need to Give a Presentation?
- When Do Events Disappear from the Web UI?
- Can I Change the Proctor for My Workshop Event?
- How Do I See Who Participated In My Workshop?
- Can We Have More Than One Proctor for Our Workshop?
- Can I Create a Private Event or Set Permissions on My Event?
- How Long Will It Take to Get Confirmation of My Workshop Event?
- How to Qualify as a Proctor
- What Is a Proctor and What Do They Do?
- What Happens to People on the Waitlist When My Event Is Full?
- How Can I Get Permission to Lead the Train the Trainer Sessions?
- How Can I Encourage Attendee Survey Completion?
