You can invite customers through Outlook/Email, URLs, X, and LinkedIn!
This new platform offers multiple ways to invite customers to your workshop. This flexibility allows you to invite your customers in the easiest way for you. It also gives you the freedom to utilize social media to expand your potential audience and attract more people to your workshops. This how-to will cover several methods you can use to share your workshop events with others. I am sure there are other ways that folks will share with me, and I will update this page as that happens. There are also some social media platforms that I do not have or use, so I won't be able to explain how to use those.
Workshop Event Invite Options:

- Outlook Invitation - Email all your potential attendees the URL to your workshop using the email templates located here
- Instructions for Sending an Email: Here
- Share the URL for your workshop. Each workshop event in the system has a unique URL that can be copy shared out. This will take your invitees to the page describing your workshop and allow them to register (once they have an account on the system).
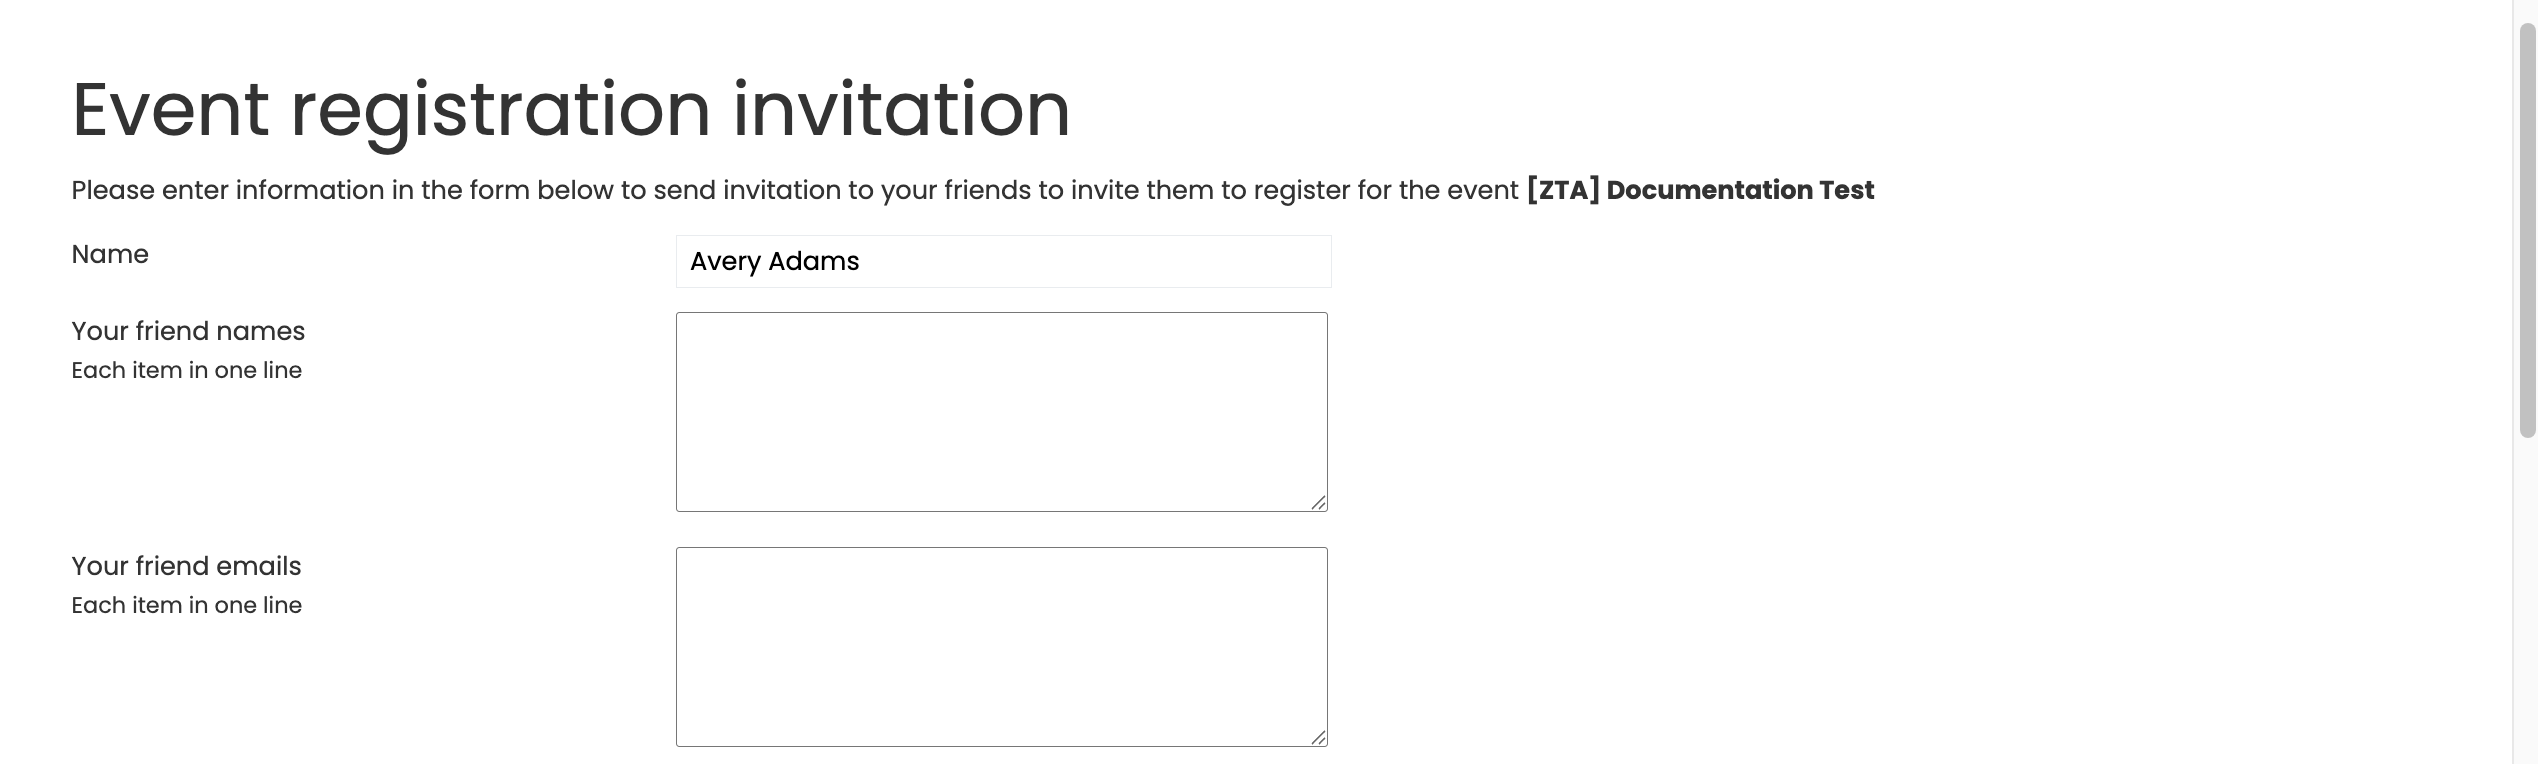
Note: This is the best method, as it allows you to create a more customized invite to each individual, and make it easier for them to respond directly to you if there's an issue. - "Invite Friend"(Group or Bulk Invite) - Clicking this button allows you to send an invite to several people at the same time.
-
Click the “Invite Friend” button, which will open a popup window.
-
In the first box on the right, enter your invitees, one per line.
-
In the second box, enter each person’s email address from the first box, one per line.
-
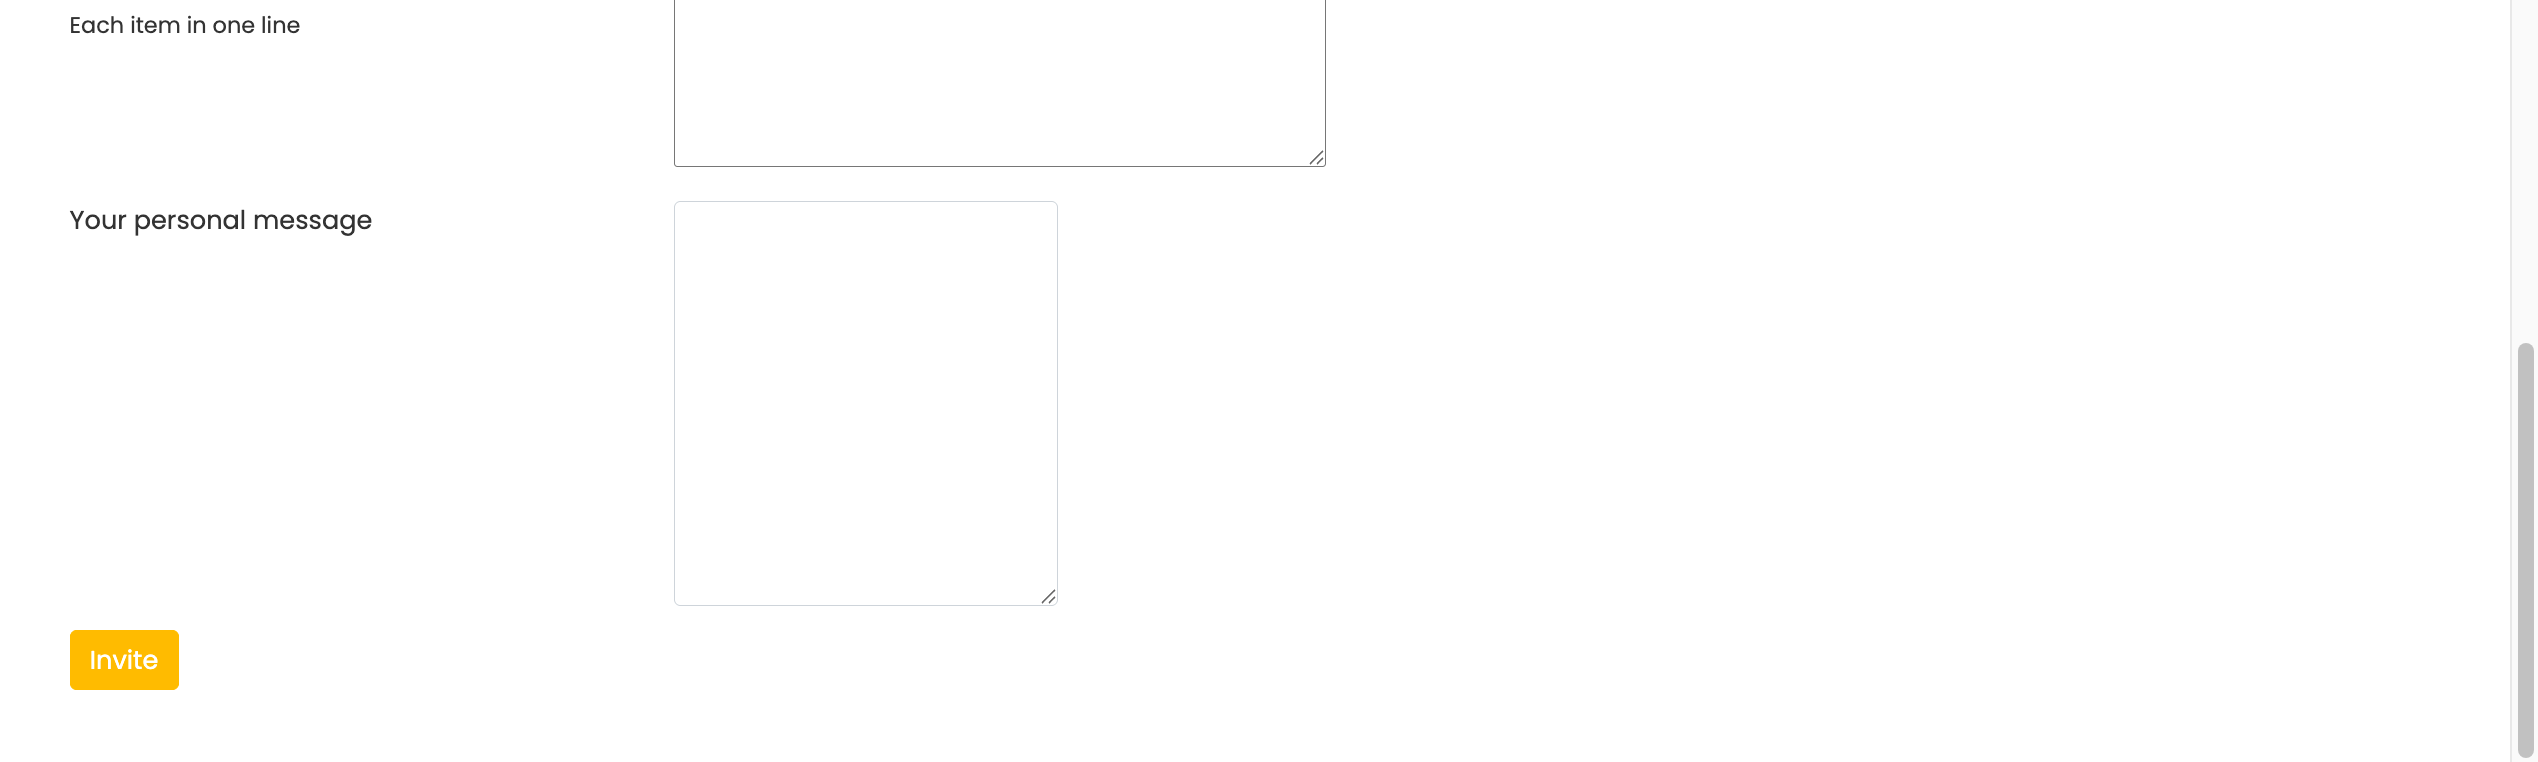
Scroll down a bit to enter a message you want sent to each person.
-
Scroll down a little more and click the “Invite” button to send the invites to the people listed in the previous boxes.
-
- Sharing via X Post - Click on the X Post button near the top right of your event and it will automatically open X (formally Twitter) in an new tab and fill in the X Post for your to share with your X Friends. Once you are in X you can just click on the Post button and your post will go out
- LinkedIn - With linked in you can post it your page like an X Post or you can message individuals directly.
- Click on the LinkedIn icon under the description
- Your LinkedIn account will open in a new tab and a popup window will display allowing you to post your workshop
- For more control over the post you can click the dropdown next your your profile picture in the top left...this will change the popup
- Now you can restrict, focus or open up who can see your workshop event post.
- If you make changes click the Done button, if not click the Back button
- You will be taken back to the original LinkedIn popup window about your post. When ready click the Post button in the bottom right of the popup.
Workshop Invitation User Experience:
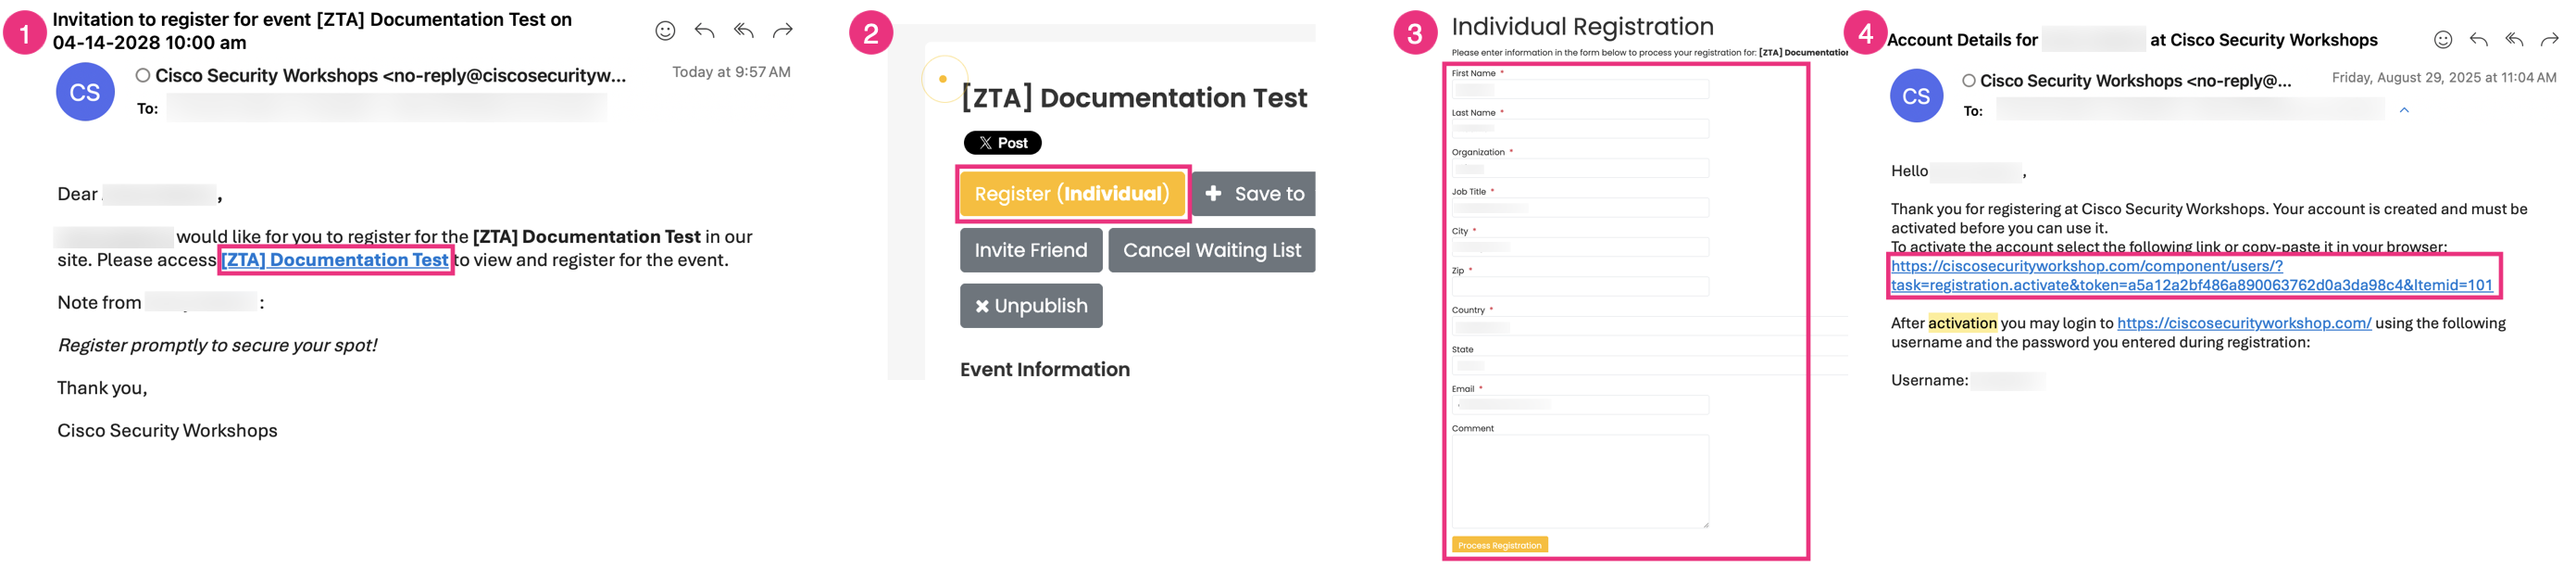
- A user receives an email inviting them to register.
- They select “Register(Individual)”
- Fill out the registration information.
- Afterward, they receive an activation email.
If you encounter any difficulties in actually getting people to attend/login the workshop, refer to this FAQ for guidance: Why Can’t My Attendees Log In?
Feel free to share instructions for other platforms!
Other Related FAQs:
- Who Can Proctor Workshop Events?
- How Do I Check-In Attendees to My Workshop Event?
- How Do I See My Survey Results?
- Will the Template Replace My Description?
- Why Do I Need to Give a Presentation?
- When Do Events Disappear from the Web UI?
- Can I Change the Proctor for My Workshop Event?
- How Do I See Who Participated In My Workshop?
- Can We Have More Than One Proctor for Our Workshop?
- Can I Create a Private Event or Set Permissions on My Event?
- How Long Will It Take to Get Confirmation of My Workshop Event?
- What Happens to People on the Waitlist When My Event Is Full?
- How Can I Encourage Attendee Survey Completion?
